TL;DR
- Twice-a-year maintenance, once in spring (March) and once in fall (October), will add 5–8 years to the lifespan of most residential garage door hardware.
- The routine: lubricate hinges/rollers/springs, tighten hardware, test balance, check sensors, inspect weather seals, visually check cables. Total time: about 30 minutes.
- Only use white lithium grease on moving parts. Never WD-40. It strips existing lubricant and leaves metal dry.
- Once a year (or every 2 years for coastal homes), have a pro come out for a full inspection of cables, springs, and opener. About $89 for the full check.
Your garage door cycles 1,500 to 2,500 times a year. That’s 15,000+ cycles over a decade, more if you’ve got kids or work from the garage. The difference between a door that lasts 25 years and one that fails at 12 is almost entirely maintenance.
San Diego’s mild climate helps (we don’t deal with ice, salt roads, or 0°F cold snaps). But our salt air, dry summers, and Santa Ana wind events take their own toll. Here’s the twice-a-year routine that keeps every San Diego garage door running smoothly.
The seasonal rhythm
- Spring (March): Full inspection and lubrication after the dry, windy winter months that blow dust and debris into the mechanism. Catch issues before summer heat stresses components.
- Fall (October): Second lubrication, weather seal check, and door-balance test before the cooler wet months. Addresses wear accumulated over a busy summer.
Both visits take about 30 minutes of actual work. Total annual maintenance investment: one hour of your time, $12–$18 in supplies (a can of white lithium grease lasts 2–3 years).
Tools and supplies you need
- White lithium grease in an aerosol can. Any hardware store. $8–$12. The only lubricant that belongs on a garage door.
- A 7/16” socket or open-end wrench. Covers 90% of residential garage door bolts.
- A stepladder. 4-foot is enough for most residential openers.
- A clean dry microfiber cloth. For wiping sensor lenses and cleaning hardware.
- A level. For the door-plumb check. A 2-foot level is fine.
- Safety glasses. Especially when lubricating overhead.
The 30-minute checklist
1. Visual inspection (5 minutes)
Walk around the inside and outside of the garage door.
- Panels: any dents, gouges, water stains, or separation at seams?
- Hardware: any visibly loose bolts, cracked brackets, or missing pieces?
- Cables: fraying, rusting, or kinked? (Broken strands look like burs on the cable.)
- Springs: any visible gaps in the coil? Any rust?
- Rollers: any chipped, cracked, or wobbly rollers?
- Track: any dents, bends, or separation from the wall?
Anything that looks wrong goes on a list for the tech. Everything else, continue.
2. Tighten visible hardware (5 minutes)
Every bolt you can reach (track bolts, hinge bolts, opener mounting bolts, bracket bolts) gets a 7/16” wrench check. Snug, not stripped. Don’t touch the winding bolts on the torsion spring itself. Those are tech-only.
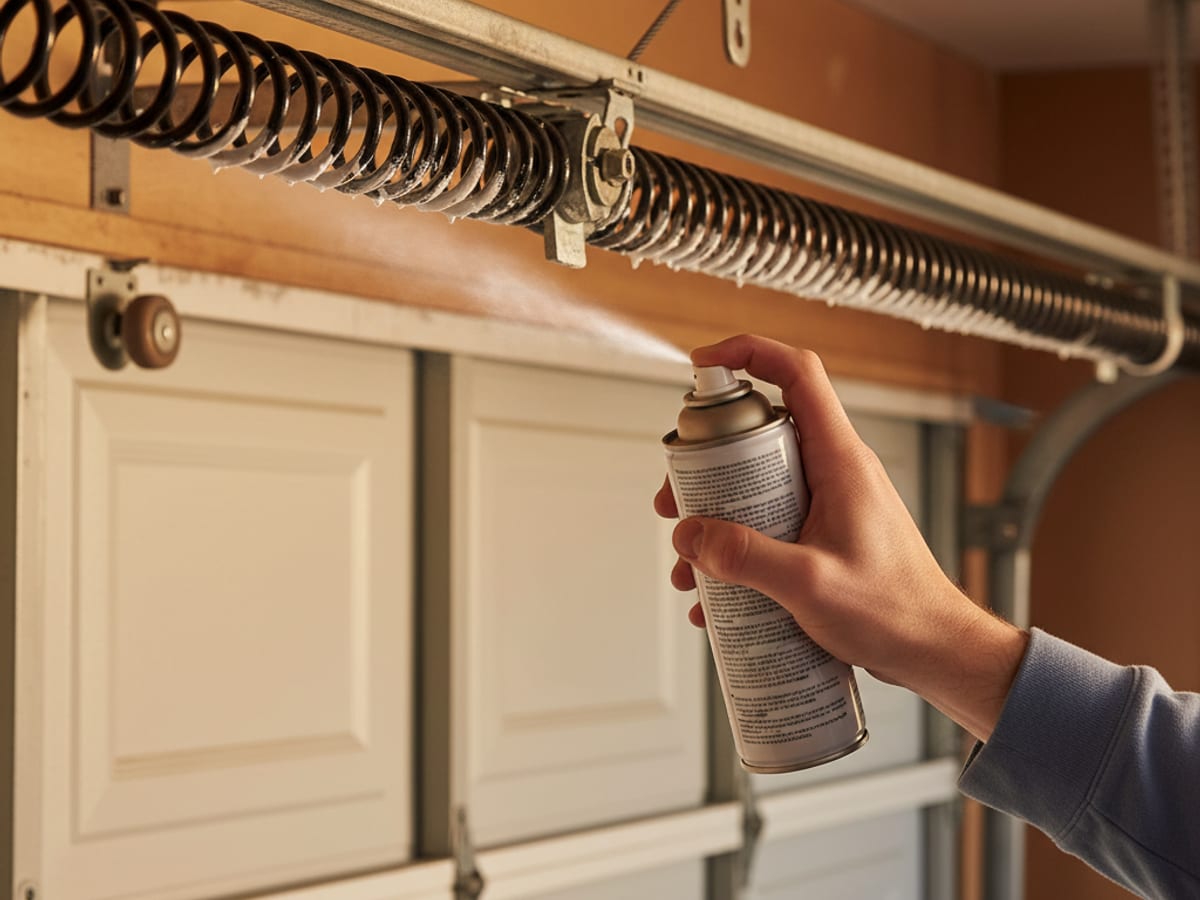
3. Lubricate (8 minutes)
Hinges: 2 drops of white lithium grease at the base of each hinge pin, both sides of every hinge. Cycle the door twice to work the grease in.
Rollers: for nylon rollers, 1 drop at the stem where the stem enters the roller bracket. For steel rollers, don’t bother lubricating. They need replacement, not lube.
Torsion spring shaft: spray a light coat of white lithium grease along the full length of both torsion springs and the shaft they’re mounted on.
Extension springs (if your door has them): light coat along the full length of each spring.
Opener rail: for screw-drive openers, a thin layer of grease along the drive screw. For chain-drives, a light coat on the chain. For belt-drives, don’t lubricate the belt, because lube causes slippage.
What not to lubricate:
- The steel tracks themselves, because nylon rollers glide better on clean dry tracks
- Rubber belts on belt-drive openers
- Photo-eye sensor lenses
4. Balance test (5 minutes)
Close the door. Pull the red emergency release cord on the opener to disconnect the door from the opener trolley.
Lift the door by hand to about waist height (3–4 feet off the floor). Let go.
- Door holds position. Springs are balanced. Door is healthy.
- Door drops fast. Springs are weak or broken. Spring replacement soon.
- Door jumps up. Springs are over-wound. Needs adjustment.
Reconnect the opener by pulling the release cord toward the door and reattaching the trolley to the carrier.
A door that fails the balance test shouldn’t keep running on the current springs. A weakening spring makes the opener work harder, which kills the opener early. See the opener lifespan guide for how that cascade works.
5. Safety sensor check (3 minutes)
Place a broom or a cardboard box in the path of the photo-eye sensors (the small devices 6 inches off the ground on each side of the door). Press the wall button to close the door.
- Door refuses to close or reverses. Sensors are working correctly.
- Door closes anyway. Sensors are disabled, broken, or bypassed. This is a code violation. Call a tech immediately.
While you’re down there, wipe the lenses on both sensors with a dry microfiber cloth. Confirm one sensor shows a steady green LED and the other shows steady red. Any blinking is a misalignment. See the won’t-close troubleshooting guide.
6. Auto-reverse force test (3 minutes)
Open the door fully. Lay a roll of paper towels or a 1.5” block of wood on the floor in the door’s path. Close the door.
The door should contact the block, then auto-reverse. If the door keeps trying to close on the block, the auto-reverse force needs adjustment. This is a code-required safety feature per UL 325, so don’t skip it. If yours doesn’t work, call for sensor and safety service.
7. Weather seal check (3 minutes)
With the door closed, look at the bottom where it meets the concrete. Do you see daylight? Do you feel a draft? Is the rubber cracked, torn, or missing pieces?
Signs of a failing seal:
- Water pools inside the garage after rain
- Insects and rodents finding their way in
- Increased dust in the garage
- Daylight visible along the bottom or sides
A new bottom seal is a $90–$140 installed job. Side and top seals with the perimeter are another $70–$100. Weather seal replacement is typically done in under 30 minutes.
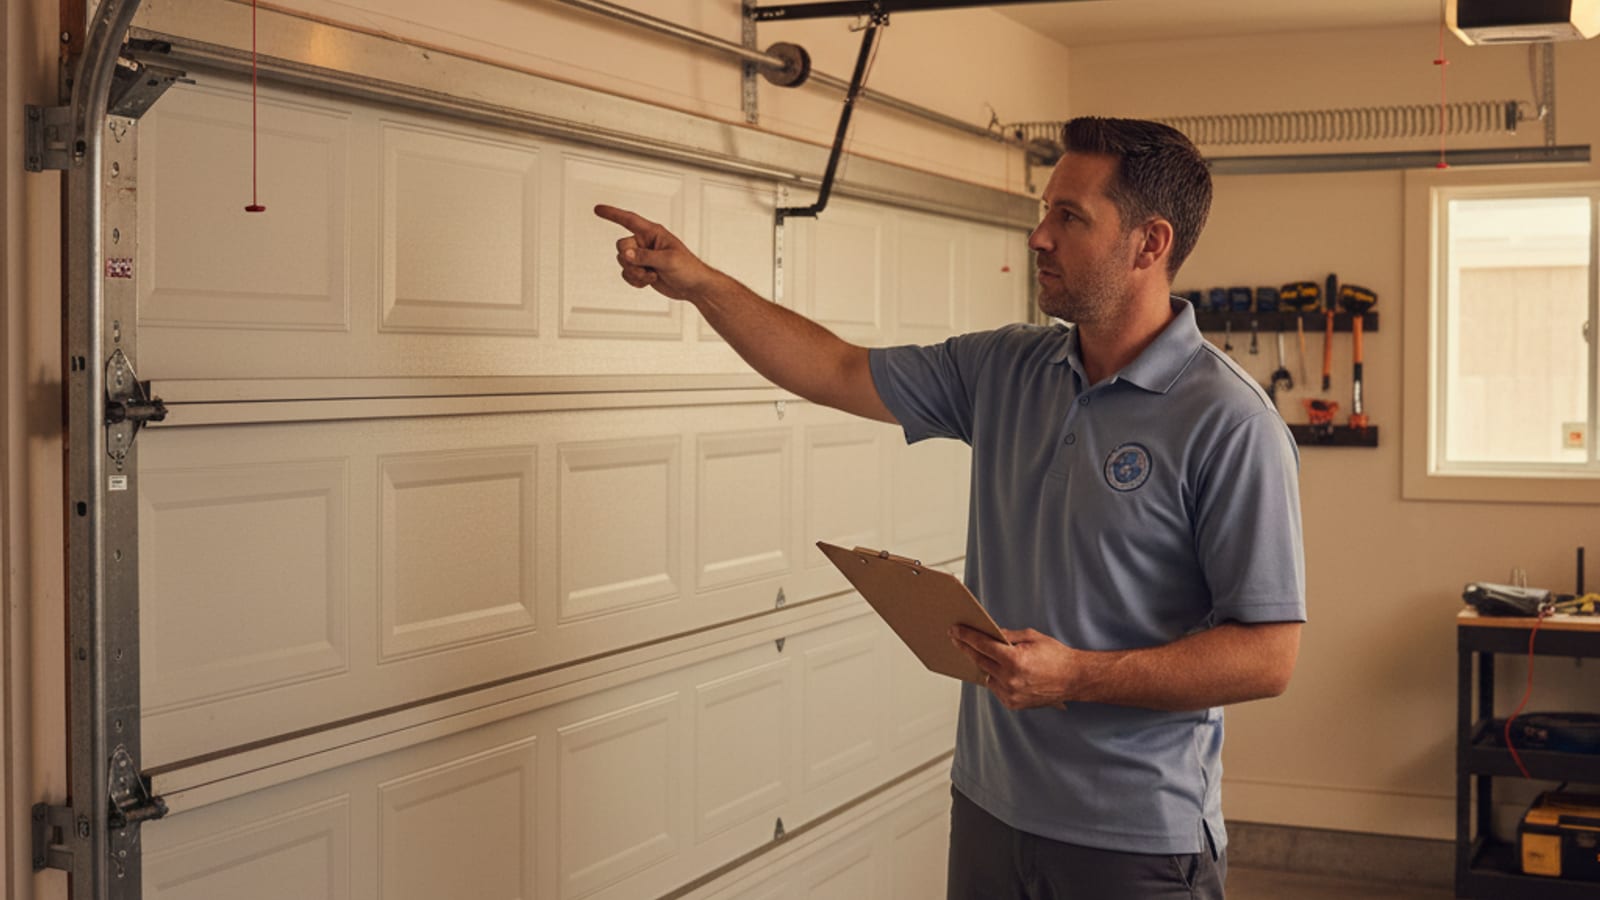
Pro inspection: when and why
Homeowner maintenance catches 80% of what matters. A professional annual (or biennial for coastal homes) full inspection catches the rest, the things that require tools, training, or access you don’t have:
- Spring tension and torque calibration
- Cable end-connector inspection
- Opener motor amperage test
- Limit switch and travel recalibration
- Hidden fastener check above the door header
A full annual inspection runs $89–$150 for the service call plus any parts or adjustments needed. Most calls, the tech finds nothing significant and rebalances one small thing. That’s money well spent compared to a $650 emergency repair.
Call cadence:
- Inland San Diego homes (Poway, El Cajon, Escondido, Chula Vista): once every 2 years.
- Coastal homes (La Jolla, Encinitas, Solana Beach, Del Mar, Imperial Beach): once a year. Salt air corrosion on cables and springs is the reason.
- Commercial or high-use residential (shared driveway, delivery-heavy, family with teen drivers): once a year.
Signs you need a call before your next scheduled maintenance
Do not wait for the next scheduled checkup if:
- Door makes a new loud noise you haven’t heard before
- Door won’t stay balanced in the manual lift test
- Cable is visibly frayed or rusted
- Spring has a visible gap in the coil
- Sensors are blinking or the door keeps reversing
- Opener is smoking, buzzing, or smells burnt
- Door is visibly off plumb or crooked in the opening
Any of these warrant a same-day call. See the repair cost guide for what you can expect to pay.
Frequently asked questions
How often should I maintain my garage door in San Diego?
Twice a year, once in spring (March) and once in fall (October), for homeowner maintenance. Plus a professional inspection once every 2 years for inland homes, once a year for coastal homes within 2 miles of the beach.
Can I use WD-40 on my garage door?
No. WD-40 is a solvent, not a lubricant. It strips the existing grease and leaves metal parts drier than before. Use white lithium grease only.
How long should garage door hardware last with regular maintenance?
Well-maintained: torsion springs 12–15 years, nylon rollers 12–15 years, cables 10–15 years, belt-drive opener 15–18 years, door panels 25–35 years. Without maintenance, cut those numbers by 30–50%.
How much does a full garage door maintenance visit cost?
A professional tune-up in San Diego runs $89–$150. That includes full inspection, lubrication, hardware tightening, balance adjustment, sensor alignment, and a written report. Any parts or major repairs are separate.
If the balance test flags a weak spring, the broken spring playbook covers what’s next and the spring replacement cost guide has the pricing. If maintenance reveals the opener is close to end-of-life, start with the opener lifespan guide. And to set expectations on what any repair will cost, the full repair pricing guide is the reference.
Want a pro to handle the full tune-up? Call Lift Pro SD at (858) 925-5546 and we’ll send a tech out the same day. A $89 tune-up catches problems early and extends door life by years. We cover all of San Diego County, from Oceanside and San Marcos down to Chula Vista and Imperial Beach.